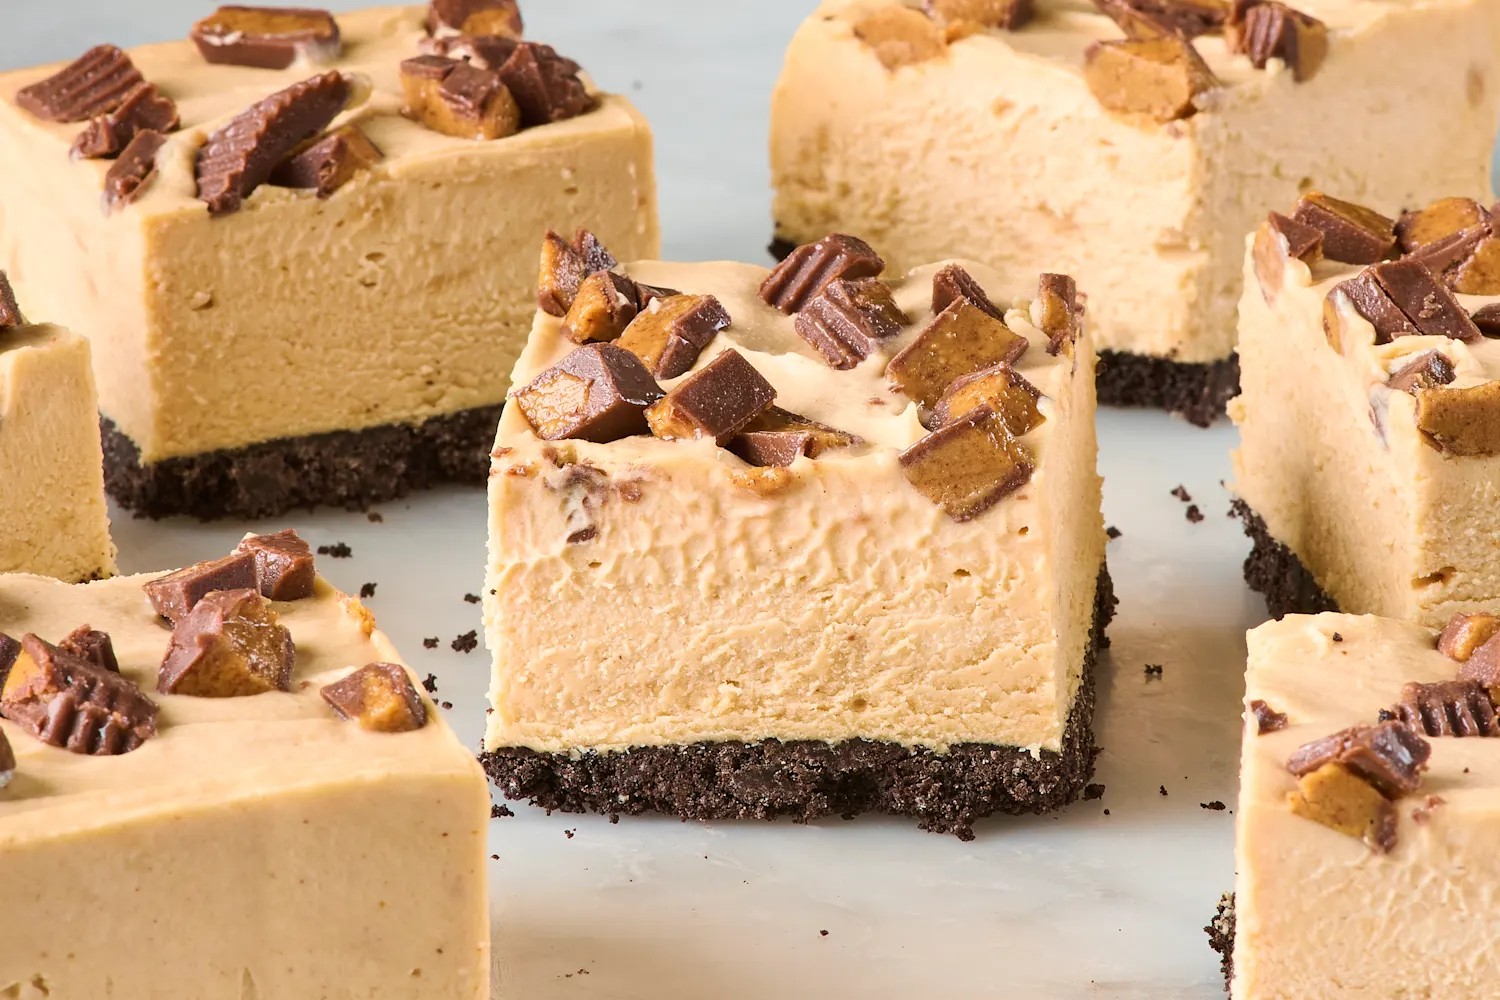
These are the kind of desserts that disappear before you can count the slices.
A crunchy, chocolatey Oreo crust. A filling that’s airy, rich, and packed with peanut butter flavor. It’s sweet, but not cloying. Tangy, thanks to cream cheese. And it requires zero oven time.
That’s the magic of no-bake frozen peanut butter bars. They’re simple, sturdy, and incredibly forgiving if you’re short on time or experience.
Here’s exactly how to make them.
Why This Recipe Works
I’ve spent over a decade in bakeries developing recipes. I know the difference between a good dessert and one that makes people close their eyes on the first bite.
This version hits the latter.
The texture is the star. You get the snap of frozen chocolate crust against the melt-in-your-mouth creaminess of the filling. It’s salty, sweet, and savory all in one square.
One of my recipe testers, Micki, put it best: “Peanut butter + Oreos + cream Cheese = one dreamy dessert. I absolutely love how fluffy the sweet, sandy, tangy, rich peanut butter filling… [It] goes perfectly with the crunchy, slightly bitter… base.”
If that doesn’t sound like your kind of treat, I don’t know what does.
Key Ingredients You’ll Need
You probably have half these items in your pantry right now. That’s part of the appeal.
Peanet Butter: Stick with the creamy, processed kind. Not the natural oil-separated variety. The standard jar gives you the consistency you need for a smooth filling that doesn’t separate or turn grainy.
Cream Cheese: This is non-negotiable for structure. It keeps the bars firm enough to cut but soft enough to bite. Must be room temperature. Cold cream cheese creates lumps. Lumps ruin the fluffiness. Softened cream cheese blends into the peanut butter like it was born together.
Heavy Cream: Cold. Very cold. You need to whip this into stiff peaks. It’s what makes the filling light and airy rather than a dense brick of fat and sugar.
Oreo Cookies: Specifically for the crust. Process them into fine crumbs. Mix with melted butter. Press down hard.
Optional Garnish: Chopped Reese’s Peanut Butter Cups. Or mini chocolate chips. Or a drizzle of melted chocolate if you want to feel fancy. But chopped Reese’s? That’s the move.
Step-by-Step: Building the Bars
1. Prep the Pan
Line an 8×8-inch baking pan with parchment paper. Create a sling by placing two sheets perpendicular to each other. They should hang over the edges like handles. This makes lifting out the frozen slab later much easier than digging around with a spatula.
Spray the parchment with cooking spray. Just a light coat.
2. Crush and Set the Crust
Process 22 Oreo sandwiches (fill included) in a food processor until you have fine crumbs. About 30 to 60 seconds should do it.
Drizzle in 5 tablespoons of melted unsalted butter. Pulse just until moistened. You don’t want wet mush. You want damp sand that holds together when pressed.
Transfer to the pan. Use the bottom of a flat measuring cup to press it down firmly and evenly. Don’t be shy. Pack it tight.
Slide it in the freezer for 10 minutes while you tackle the filling.
3. Whip the Filling
In a stand mixer with the whisk attachment, beat 1 3/4 cups of cold heavy cream on medium speed. You’re looking for firm peaks. Takes about 5 to 8 minutes. Don’t overbeat it into butter, but don’t stop at soft peaks either. Transfer to a separate bowl.
Note: You don’t need to clean the bowl.
4. Cream the Base
Add 8 ounces of room-temperature cream cheese and 1 1/2 cups of creamy peanut butter to the mixer (now switched to the paddle attachment if you have time to swap, though not strictly required). Beat on low until smooth. About 20 seconds.
Gradually add 1 1/2 cups of powdered sugar. Scrape down the sides. Add 2 teaspoons of vanilla extract. Mix until combined.
5. Fold It Together
Here is the gentle part. Add half the whipped cream to the peanut butter mixture. Fold with a spatula just until incorporated. Do the same with the second half. You’re aerating the heavy mixture without deflating the whipped cream. Stop when you see no white streaks.
6. Assemble and Freeze
Spread the filling over the chilled crust. Smooth the top.
If you’re using chopped Reese’s, sprinkle them on now.
Cover tightly. Freeze until set. At least 4 hours. Overnight is better. It lets the flavors meld and the texture stabilize.
Serving and Storage
Take the pan out. Grab the parchment handles. Lift the slab out. Place it on a cutting board.
Wait. Let it sit at room temperature for 10 to 15 minutes.
Trying to cut these straight from the freezer will result in shattering. A brief thaw makes them sliceable. Clean your knife between cuts. Warm it slightly under hot water if you want pristine edges.
Cut into 12 or 16 squares.
How long do they last?
Wrap them tightly or store in an airtight container. They’ll keep in the freezer for up to a week.
I know, they usually won’t last that long. But if you have the discipline, they freeze well. The texture doesn’t suffer significantly.
Why You Should Trust This Method
I don’t write recipes for the sake of having something to publish. I write them because I’m obsessed with how food feels in your mouth.
A no-bake bar can go wrong quickly. It can be too sweet. Too hard. Too crumbly.
By balancing the tang of cream cheese with the richness of peanut butter, and the crunch of the crust against the fluff of whipped cream, you get something that feels sophisticated but takes less effort than making a cup of coffee.
It’s a low-effort, high-reward dessert. Perfect for summer, parties, or when you just want chocolate without turning on the oven.
Go make some.
“Low effort meets maximum flavor. I’m here for it.”
The bars are ready. The freezer is full. The only question left is: are you sharing them with anyone?